Courtesy of Bodybuilding.com
Ingredients
Olive oil: 1 tbsp.
Onion, chopped: 1 cup
Sweet paprika: 1/4 cup (Hungarian if you can find it)
Beef bottom round or tri-tip (lean only), cut into 1’’ pieces: 2 lb.
Garlic cloves, minced: 4
Bell pepper, chopped: 1
Canned organic diced tomatoes: 28 oz.
Celery, chopped: 1/2 cup
Beef broth: 1 cup
Worcestershire sauce: 2 tbsp.
Salt: 1 1/2 tsp.
Black pepper: 1/2 tsp.
Bay leaves: 2
Caraway seed, crushed: 1 tsp. (optional)
Directions
In a Dutch oven or large saucepot, cook onions with olive oil over medium-high heat, stirring frequently, until lightly browned.
Remove from heat, and stir in paprika (you don’t want the paprika to burn and turn bitter).
Add diced beef and minced garlic and return to heat. Cook for 15-30 minutes until tender and no longer pink (tougher cuts require more time).
Add bell pepper, diced tomatoes, celery, and remaining ingredients. (This is also where you would add other diced vegetables like carrots, parsnips, or potatoes).
Bring to a boil, cover, reduce the heat to medium, and simmer for 30-40 minutes.
For meal prep, divide the batch into six portions. Enjoy!
- Posted using BlogPress from my iPhone


18.12.16
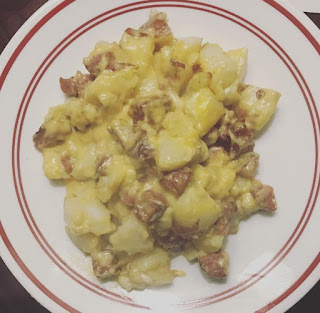
Sausage & Cheesy Potatoes
Perfect for this chilly December
Ingredients
3 cups idaho potatoes, peeled, boiled and cut into cubes when cool, approx. 1 lb
4 tablespoons butter
4 tablespoons flour
2 cups milk
1⁄2 teaspoon salt
1⁄4 teaspoon pepper
1⁄2 lb Velveeta cheese, diced
1⁄2 cup sharp cheddar cheese, shredded
1 lb skinless smoked sausage (Eckrich is my favorite brand)
1⁄8 teaspoon paprika
Directions
Cut skinless smoked sausage in half, lengthwise, and then chop into 1/2 inch "half moon" cuts. Cook in a frying pan for about 15 minutes, turning frequently to SLIGHTLY brown.
Meanwhile, put cooked & diced potatoes in 2 quart casserole. Add cooked meat and give it a gentle toss.
Mix all remaining ingredients (except for shredded cheddar cheese & the paprika) in a saucepan over medium heat until warm, melted and smooth. (Use a whisk and stir constantly.).
Pour white/cheese sauce over potatoes and meat. Sprinkle shredded sharp cheddar cheese on top, and then sprinkle paprika evenly over the top.
Bake in preheated 350°F oven for 35-45 minutes (watch, until golden brown on top).
NOTE: You can substitute: 1/2 lb. hot dogs, sliced into 1/2-inch slices OR 1/2 lb. ham diced into 1/2-inch dices OR 12 oz. can of Spam diced into 1/2-inch dices, instead of the smoked sausage.
Ready In 1 hr
Serves 4-6
- Posted using BlogPress from my iPhone
Ingredients
3 cups idaho potatoes, peeled, boiled and cut into cubes when cool, approx. 1 lb
4 tablespoons butter
4 tablespoons flour
2 cups milk
1⁄2 teaspoon salt
1⁄4 teaspoon pepper
1⁄2 lb Velveeta cheese, diced
1⁄2 cup sharp cheddar cheese, shredded
1 lb skinless smoked sausage (Eckrich is my favorite brand)
1⁄8 teaspoon paprika
Directions
Cut skinless smoked sausage in half, lengthwise, and then chop into 1/2 inch "half moon" cuts. Cook in a frying pan for about 15 minutes, turning frequently to SLIGHTLY brown.
Meanwhile, put cooked & diced potatoes in 2 quart casserole. Add cooked meat and give it a gentle toss.
Mix all remaining ingredients (except for shredded cheddar cheese & the paprika) in a saucepan over medium heat until warm, melted and smooth. (Use a whisk and stir constantly.).
Pour white/cheese sauce over potatoes and meat. Sprinkle shredded sharp cheddar cheese on top, and then sprinkle paprika evenly over the top.
Bake in preheated 350°F oven for 35-45 minutes (watch, until golden brown on top).
NOTE: You can substitute: 1/2 lb. hot dogs, sliced into 1/2-inch slices OR 1/2 lb. ham diced into 1/2-inch dices OR 12 oz. can of Spam diced into 1/2-inch dices, instead of the smoked sausage.
Ready In 1 hr
Serves 4-6

- Posted using BlogPress from my iPhone
15.12.16
Sweet & Sour Chicken
Sweet and Sour Chicken (Paleo & Low FODMAP)
Sarah Nevins
Yields 3-4
Sweet and Sour Chicken made healthy with low fodmap, paleo ingredients free of additives and full of flavor.
10 min
Prep Time
20 min
Cook Time
30 min
Total Time
Ingredients
1 pound boneless, skinless chicken breasts, cut into 1-inch chunks
1/2 cup (65 grams) arrowroot starch (or cornstarch)
1 large egg beaten
1/4 cup (55 grams) coconut oil
1/2 cup (100 grams) coconut sugar or regular white sugar
1/4 cup (60 ml) apple cider vinegar*
2 tablespoons coconut aminos (or gluten free soy sauce/tamari)
1/4 cup ketchup - for low fodmap ketchup see the notes
1/4 cup (60 ml) chicken stock
1 red pepper cut into chunks
1 cup pineapple chunks
3 spring onions stalks (green part only for low fodmap)
Instructions
First prepare the sauce by adding the coconut sugar, vinegar, coconut aminos, chicken stock and ketchup to a medium sauce pan. Stir and bring to a boil. Reduce to a low heat and leave until later.
Add chicken pieces and beaten egg to a large ziplock bag. Seal and shake to coat chicken. Then add the arrowroot starch to the bag, shaking again to lightly coat all the chicken pieces.
Drizzle a large pan or skillet with oil. Add the coated chicken. Fry over medium heat, a couple of minutes on each side until the coating begins to crisp. Add pepper and pineapple chunks. Continue to saute over medium heat until chicken is browned and cooked through.
Add the sauce to chicken and peppers. Cover and reduce the heat down to a simmer and allow the juices to soak into the chicken for a few minutes. Top with sliced green onions. Serve over rice and enjoy!
Recipe Type: Mains
Notes
Apple cider vinegar is considered low FODMAP under 2 tablespoons, but if you would prefer another alternative just to be on the safe side you can also use white wine or rice vinegar instead

Low fodmap ketchup recipe: http://www.asaucykitchen.com/low-fodmap-ketchup-diy/
http://www.asaucykitchen.com/sweet-and-sour-chicken-paleo-low-fodmap/
- Posted using BlogPress from my iPhone
13.12.16
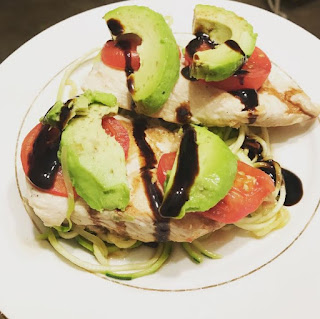
Avocado Chicken Skillet
This is one of my favorite meals. I am including the part where it adds CHEESE because that is how I usually cook it for my husband!
Ingredients
2 (10 - 11 oz each) boneless skinless chicken breasts, butterflied and halved
1/2 tsp garlic powder
1/2 tsp onion powder
1/2 tsp Italian seasoning
Salt and freshly ground black pepper
2 Tbsp olive oil
6 oz fresh mozzarella, cut into 8 slices
4 avocado slices (from a firm but ripe large avocado)
2 medium vine ripened tomatoes, sliced
3 Tbsp balsamic glaze (I used Bertolli)
1/3 cup chopped basil ribbons
Directions
In a bowl mix together garlic powder, onion powder, Italian seasoning, 1/2 tsp salt and 1/4 tsp pepper. Sprinkle mixture evenly over both sides of each chicken cutlet. Heat olive oil in a 12-inch skillet over medium-high heat. Add chicken (cover pan with a splatter screen if you have one) and cook until golden brown on bottom, about 4 - 6 minutes. Rotate and cook opposite side until chicken has nearly cooked though, reducing burner temperature just slightly if needed, about 4 - 5 minutes (it should be nearly 160 in center on an instant read thermometer) then add two slices of mozzarella to the top each cutlet, followed by one avocado slice, and 1 - 2 tomato slices. Cover pan with lid, return to heat and allow to cook 1 - 2 minutes longer until cheese has melted and chicken registers 165 in center.
Sprinkle chicken with pepper, drizzle with balsamic glaze and sprinkle with fresh basil. Serve warm.
Recipe source: Cooking Classy

12.12.16
Sausage egg roll bowl
So yummy
Sausage Egg Roll in a Bowl – Paleo, Low Carb, Whole30
Prep Time: 5 minutes
Cook Time: 25 minutes
Yield: 4 Servings
Per Serving - Calories: 255 | Fat: 18.7g | Protein: 14.8g | Total carbs: 8g | Fiber 3.8g | Net Carbs: 4.2g
Ingredients
2 tbsp sesame oil (get it here)
3 cloves garlic, minced
1/2 cup onion, diced
5 green onions, sliced on a bias (white and green parts)
1 lb ground pork
1/2 tsp ground ginger (get it here)
sea salt and black pepper, to taste
1 tbsp Sriracha. more to taste
14 oz bag coleslaw
3 tbsp Coconut Aminos (get it here)
1 tbsp Rice Wine Vinegar (get it here)
2 tbsp toasted sesame seeds
Instructions
Heat sesame oil in a large skillet over medium high heat.
Add the garlic, onion, and white portion of the green onions. Sauté until the onions are translucent and the garlic is fragrant.
Add the ground pork, ground ginger, sea salt, black pepper and Sriracha. Sauté until the pork is cooked through.
Add the coleslaw mix, coconut aminos, and rice wine vinegar. Sauté until the coleslaw is tender.
Top with green onions and sesame seeds before serving.

- Posted using BlogPress from my iPhone
11.12.16
Chicken spinach and pasta bake
Sorry not paleo. Or gluten free. Or dairy free. Toss the health book out for this one
It's been a bit of a frenzied week here in our house. My daughter's fourteenth birthday party is this Saturday. We have over thirty guests set to attend and I've been in my crazy party prep mode since the weekend. (My poor children and husband know what I'm talking about ... don't ya, guys?)
I still have most of the shopping to do and a bit of housework yet to get done. The always-present-the-week-before-a-major-party-event chore list has been posted on the fridge for several days ... color-coded according to each family member's respective day-to-day tasks for the week. (I know ... my OCD really comes out in full force at times such as these!) Since all of my children have their birthdays in the spring, we get ready for their parties and get much of our spring cleaning done all at the same time. (It's a win-win for this mom!)
I'm taking a brief break, however, to share this wonderfully scrumptious recipe with you. It's a very simple pasta bake that could be changed up to suit your tastes and to utilize what you have on hand. Swap out the spinach for some blanched broccoli. Add in some canned artichokes or fresh, chopped mushrooms. Want to make it a little more healthful? Use whole wheat pasta.
Yields 6 - 8 servings.
Ingredients:
10 ounces dry pasta (I used a combination of rotini, farfalle and penne. Any similar size would work.)
2 tablespoons butter
1/2 onion, chopped
2 cloves garlic, minced
4 ounces chive and onion cream cheese
1 cup sour cream (or plain Greek yogurt)
1 cup whole milk, heavy cream or half-and-half (I used half-and-half)
1/2 cup shredded or grated Parmesan cheese
2 cups shredded mozzarella cheese
1/2 teaspoon salt
1/2 teaspoon black pepper
Pinch crushed red pepper flakes (optional)
1 - 1 1/2 cups chopped fresh spinach
2 cups cooked chicken (cubed or shredded)
1/2 cup fresh tomatoes, cut into large chunks (Can use grape/cherry tomatoes sliced in half)
Fresh basil or parsley, for garnish
Directions:
Preheat oven to 400 degrees.
Coat a medium casserole dish with non-stick spray. (Mine was a 10" round, but a 9 x 13 would work fine.)
Cook pasta in salted, boiling water to al dente. Drain and set aside.
While pasta is cooking, heat butter in a medium saute pan set to medium heat. Add in the onion and garlic. Cook for 3 - 4 minutes to slightly soften veggies. Do not brown.
Add in cream cheese and stir to melt. Reduce heat to low. Stir in sour cream, milk, Parmesan cheese, 1 cup of the mozzarella cheese, salt, black pepper and red pepper flakes (if using). Stir until everything is well-combined and melted. Turn off heat.
Combine the pasta, chicken, spinach and tomatoes in a large bowl.
Add in the sauce and gently stir to coat.
Pour into the prepared baking dish. (I drizzled in a little more half-and-half over the mixture once it was in the baking dish because it looked a little dry to me.)
Top with the remaining mozzarella.
Bake for 20-25 minutes
Original poster Here

- Posted using BlogPress from my iPhone
2.12.16
Chicken and Broccoli Casserole
Ingredients
4 cups of fresh broccoli
2 cups of chicken, cooked and cubed
1 can of cream of chicken soup
1/2 cup of sour cream
1 teaspoon lemon juice
1/2 cup shredded sharp cheddar cheese
1/2 cup soft bread crumbs
2 Tablespoons melted butter
Instructions
Preheat oven to 350 degrees.
Cook broccoli in boiling salted water until tender and drain. Cut into small pieces.
In a small bowl mix together your cream of chicken soup, sour cream and lemon juice. Set aside.
In a 9x13 greased pan put in your broccoli and chicken. Pour your soup mixture over top and mix together. Sprinkle with grated cheese. Combine bread crumbs with butter and sprinkle on top.
Bake for 25-30 minutes.

Recipe from: http://www.sixsistersstuff.com/2015/10/quick-chicken-and-broccoli-casserole-recipe.html
Six Sisters Stuff
- Posted using BlogPress from my iPhone
1.12.16
Baked Bell Pepper Tacos
Ingredients
4 large bell peppers
3-4 cups taco filling (see below)
3/4 cup shredded cheese, extra as desired
3/4 cup chopped tomato
3/4 cup chopped lettuce
cilantro and lime, as a tasty edible garnish
Avocado
Cream cheese
Cut up tops of peppers
FEISTY FILLING OPTIONS:
a. 1lb ground beef, chicken, or turkey - seasoned your favorite way and browned on the stove-top! I use a combination of FLAVOR GOD Taco Tuesday and it's AMAZING
TASTY TOPPINGS (choose your favorites)
shredded cheddar or pepper jack cheese
sour cream or plain Greek yogurt
fresh cilantro
fresh or leftover grilled/roasted/sautéed veggies
fresh chopped avocado
guacamole
pico de gallo
salsa verde
salsa
lime wedges
Instructions
Pre-heat oven to 350 degrees F.
Choose your protein option(s) from the above list and cook via preferred method. Toss in seasonings and the chopped up tops of peppers.
Add cream cheese as desired (adds a creamy flavor)
Slice each bell pepper in half. Hollow out each pepper, removing stem, seeds, etc...
Fill each pepper to the brim with your taco filling of choice and top with cheese unless keeping Whole30
Bake for an additional 10 minutes, then pile mile-high with all your favorite taco toppings! Anything goes on taco night!

- Posted using BlogPress from my iPhone
30.11.16
ONE PAN CRANBERRY BALSAMIC ROASTED CHICKEN
Ingredients
2.5 lbs chicken thighs or breasts with skin on (around 4 to 6 chicken thighs or breast)
fresh thyme
a sprinkle of dried Italian herbs (optional)
1/3 cup to 1/2 cup fresh cranberries (or previously frozen)
1 tbsp each maple syrup and balsamic vinegar mixed together to coat chicken during roasting
For the Marinade
1/3 cup cranberries
2 tbsp olive oil
2 tbsp tamari sauce or gluten free soy sauce
2 tbsp maple syrup
1/4 cup balsamic vinegar
1/4 tsp sea salt
1/4 tsp black peppers
2 garlic cloves (or 1 tsp minced)
Order Ingredients
Instructions
Clean your chicken then place in a roasting or baking dish. Set aside.
Next prepare your marinade.
Blend all the ingredients listed in the Marinade in a food processor or blender until liquified and smooth.
Pour this over the chicken thighs, coating evenly.
Cover and place in fridge to marinade for 30 minutes or up to 24 hrs.
Once marinaded, preheat oven to 375F.
Remove chicken from fridge.
Add your extra 1/3 to 1/2 cup cranberries, thyme, and Italian herbs to the dish. Spread it out evenly on and around the chicken.
Bake skin side down first for 22 minutes.
Remove and turn skin side up. Then brush each chicken skin with the maple syrup/balsamic vinegar combo.
Add more seasoning (like dried herbs, salt, pepper) to the top if desired. if using fresh herbs, wait to add until after broil
Broil for about 5 minutes or until skin is crispy and chicken is cooked evenly inside.
Updated If using boneless chicken, cooking time will be around 35 minutes total.
After thoroughly cooked, remove from oven.
Spoon the sauce from the pan onto each chicken thigh/breast and a pinch of black pepper or cracked pepper.
Serve with the roasted cranberries on top and any extra fresh herbs desired.

29.11.16
Jawbone Giveaway
In honor of Giving Tuesday I am giving away a Jawbone Up2
On my Instagram account you can enter to win!
Rules:
1: follow the account (I will check)
2: comment and tag a friend
Open to US mailing addresses only
Giveaway will close Wednesday 11/30 at 830pm EST

- Posted using BlogPress from my iPhone
On my Instagram account you can enter to win!
Rules:
1: follow the account (I will check)
2: comment and tag a friend
Open to US mailing addresses only
Giveaway will close Wednesday 11/30 at 830pm EST

- Posted using BlogPress from my iPhone
30.10.16
Irish Beef Stew & Mashed potatoes
Recipe courtesy of Simply Whisked
Prep time: 15 mins
Cook time: 2 hours 30 mins
Total time: 2 hours 45 mins
Serves: 6
Ingredients
1 tablespoon olive oil
1 pound beef stew meat
4 large carrots, peeled & chopped
1 parsnip, chopped (about 1 cup)
1 onion, chopped
2 cloves garlic, minced
¼ teaspoon dried thyme
¼ teaspoon dried rosemary
¼ teaspoon dried parsley
1 large bay leaf
2 cups beef broth
2 tablespoons butter, melted
2 tablespoons all-purpose flour
¾ cup frozen peas
¾ - 1 teaspoon salt
¼ teaspoon pepper
Mashed potatoes:
4 baking potatoes, peeled and chopped into large chunks
4 cloves garlic, smashed
5-6 tablespoons butter
3 tablespoons coconut milk
Instructions
Brown the meat over medium-high heat in olive oil.
Add garlic, onion, carrots, parsnip and spices.
Cook for 5 minutes before adding beef broth.
Cover and simmer over medium-low heat for at least 2 hours.
After about 1½ hours, make mashed potatoes.
Boil potatoes in salted water for about 20 minutes or until fork tender.
Strain potatoes and mash with the butter and milk.
Mix the melted butter and flour together to make a roux.
Add the roux, peas and salt & pepper to the stew.
Raise heat to medium-high and continue to cook for ten more minutes.
Remove the bay leaf.
Serve the stew over the mashed potatoes.

- Posted using BlogPress from my iPhone
27.10.16
Low carb Hamburger Casserole
Dinner thanks to Grass fed girl
Low Carb Hamburger Casserole Recipe:
Prep time: 20 minutes
Cook time: 40 minutes
Serves:4
Ingredients:
1 large head cauliflower
1 lb ground beef
1/2 teaspoon cumin
1/4 teaspoon paprika
1/2 teaspoon dried oregano
Sea salt and pepper
1 cup coconut milk (or heavy whipping cream)
1 cup chicken bone broth
2 eggs
1/4 cup sliced almonds
Directions:
Preheat the oven to 350 degrees. Cut the cauliflower into florets and discard the core. Cut the cauliflower into even smaller and more uniform pieces. Place a steamer pot over medium heat with a few inches of water. Add the cauliflower into the top and season with salt. Steam the cauliflower until aldente (barely cooked) and then remove it from heat and set aside uncovered. Place the ground beef in a frying pan over medium heat and season liberally with salt and pepper, cumin, paprika, and oregano. Break up the beef into small pieces with a spatula while cooking. When the meat is mostly cooked remove it from the heat and set aside. Beat the eggs, cream and broth together with a pinch of salt and pepper in a bowl. In a casserole pan layer the cauliflower and ground beef until it is used up. Pour the egg mixture over it, making sure the meat and cauliflower is covered. Bake the casserole for 40 to 45 minutes until the center is set. Add the sliced almonds and broil for 2-3 minutes. Let it cool for 5 minutes then serve and enjoy.


- Posted using BlogPress from my iPhone
26.10.16
Paleo Crab Cakes
Dinner tonight is Paleo Crab cakes
Recipe inspired by Healthy Gourmet
Ingredients
Instructions
Avocado Mayo:
Recipe inspired by Healthy Gourmet
Ingredients
- 1 lb. crab meat, cooked
- 1 cup cauliflower florets, steamed well
- 2 pastured eggs
- 3 Tbsp. coconut flour
- 3 Tbsp. Avocado Mayo (recipe below)
- 2 Tbsp. fresh parsley, chopped
- ½ tsp. sea salt
- ½ tsp. Old Bay seasoning
- 2 Tbsp. avocado oil or coconut oil
Instructions
- In a medium bowl, add the steamed cauliflower. Gently break up into small pieces, mashing some. Leave some pieces intact for texture.
- Add the crab meat and parsley. Gently fold the mixture to distribute the ingredients evenly without breaking up the crab too much.
- In a small bowl, whisk together the eggs, mayonnaise, Old Bay and salt. Pour over the crab meat mixture and gently fold.
- Now sift the coconut flour over the crab and gently fold the mixture until everything is uniform. The coconut flour is what helps give these cakes that crispy-golden crust.
- Transfer to the fridge to chill and firm up - about 10 minutes. Preheat oven to 350 F.
- Remove crab mixture from fridge and form into patties. I made mine about 2 inches thick and 3 inches in diameter.
- Heat oil in a cast iron pan over medium-high heat. When oil is shimmering, add the crab cakes, being careful to not overcrowd the pan (this will cause steaming, not searing). Cook about 3 minutes to golden brown, then flip and cook another 3 minutes.
- Place pan-fried crab cakes on a baking sheet and transfer to the preheated oven to cook through (12 to 15 minutes)
- Serve with fresh lemon wedges and Paleo mayo
Avocado Mayo:
- 2 egg yolks, preferably organic from pastured chickens
- 2 teaspoons freshly squeezed lemon juice
- 1 teaspoon Dijon mustard
- 1 teaspoon white wine vinegar
- Sea salt to taste
- 1/4 cup melted butter in a glass measuring cup
- 3/4 cup nut or olive oil (macadamia, light olive, or walnut oil work wellDirections:
- Combine the egg yolk, lemon juice, vinegar and salt in the bowl of a food processor and process for a few seconds to mix.
- Have the butter melted to a liquid, but not super hot. Mix in the oil.
- With the machine running, slowly add the melted butter/oil mixture to the yolk mixture a tiny bit at a time, until the mixture starts to stiffen and emulsify, about 2 minutes.
- If the mayonnaise gets too thick, just blend in 1 teaspoon of boiling water to thin it.
- Taste and adjust the seasoning.
24.10.16
Chicken Fajita Roll Ups
This recipe brought to you by: Eat yourself skinny
Enjoy with an avocado and whatever side you want
Chicken Fajita Roll-Ups
Serves: 3 Servings
INGREDIENTS
For the Marinade:
2 Tbsp olive oil
Juice of half a lime
1 clove garlic, minced
1 tsp. chili powder
½ tsp. cumin
½ tsp. dried oregano
½ tsp. salt
Pinch of cayenne pepper (optional)
2 Tbsp cilantro, chopped
For the Chicken:
3 chicken breasts or 6 thin sliced chicken cutlets ¼-inch thick
½ red bell pepper, sliced
½ yellow bell pepper, sliced
½ green bell pepper, sliced
INSTRUCTIONS
In a small bowl, whisk together olive oil, lime juice, garlic, chili powder, cumin, oregano, salt, cayenne (if using) and cilantro. Set aside.
For the chicken breasts, if you purchased pre-sliced chicken cutlets then skip to the next step. If using chicken breasts, slice them longways into 2 even slices and firmly pound the chicken using the smooth side of a meat tenderizer to an even thickness of about ¼ inch.
Place chicken cutlets into a large resealable freezer bag and pour marinade over top, making sure they are completely coated. Allow chicken to marinate for a minimum of one hour to overnight.
Once chicken has marinated, evenly place 6 bell pepper slices in the middle of the chicken cutlet, roll up and secure with a toothpick. Repeat this step until all the cutlets have been rolled up and place seam side down in a prepared baking dish.
Brush tops of chicken with remaining marinade and bake, uncovered, at 375 for about 25 to 30 minutes or until the juices run clear. Serve and enjoy!

- Posted using BlogPress from my iPhone
21.10.16
Pulled pork over sweet potatoes
Dinner thanks to: Skinny mom
Serving size: 1 sweet potato, 4 oz pulled pork & 1/4 cup BBQ sauce
Ingredients
2 sweet onions, cut into chunks
½ cup reduced-sodium beef broth
2 pounds boneless pork loin roast
½ teaspoon chili powder
½ teaspoon cumin
½ teaspoon salt
½ teaspoon black pepper
½ teaspoon garlic powder
1 cup Stubb's® Original All Natural Bar-B-Q Sauce
¼ cup apple cider vinegar
1 tablespoon brown sugar
1 teaspoon worcestershire sauce
8 medium-sized sweet potatoes
Optional*:
4 tablespoons Stubb's® Original All Natural Bar-B-Q Sauce (for drizzle)
Instructions
Put onion chunks and beef broth in a slow cooker and set aside.
Trim fat from pork. In a small bowl, mix chili powder, cumin, salt, pepper and garlic powder. Rub mixture evenly over pork. Place meat in slow cooker (if necessary, cut meat to fit into cooker).
Cover and cook on low for 8-9 hours or on high for 4-4½ hours.
45 minutes before pork is ready, set oven to 400º F. Wash sweet potatoes and pierce each sweet potato several times with a fork. Place the sweet potatoes on a baking sheet lined with foil. Bake for 45 minutes, until potatoes are tender. (To save time you can microwave your sweet potatoes! Puncture each sweet potato several times with a fork. Evenly arrange potatoes in a microwave-safe dish. Cook on high for 4-5 minutes for the first potato, plus 2-3 minutes for each additional potato. Flip potatoes halfway through cooking.)
Remove meat from the slow cooker and place in a large bowl. Use a slotted spoon to remove onion chunks and place in the same bowl as the pork. Using forks, pull meat apart.
In another large bowl, combine BBQ sauce, apple cider vinegar, Worcestershire sauce and brown sugar. Pour over shredded pork and onions; mix thoroughly to coat.
Using a knife, slice sweet potatoes down the middle, creating an open center. Fill each sweet potato with 4-ounces of the meat mixture. Optional: drizzle ½ tablespoon of BBQ sauce back and fourth over the top of each potato.


- Posted using BlogPress from my iPhone
20.10.16
Paleo shepherd pie
Original recipe from : Tastes of Lizzy t
Ingredients
5 large potatoes, peeled and quartered
1/2 stick butter, ghee or coconut oil
1/4 cup almond milk
salt and pepper, to taste
Sauce:
1 cup petite diced tomatoes
1 1/2 cup beef stock
1 teaspoon basil
2 teaspoons minced garlic
1 teaspoon Italian seasoning
1 teaspoon salt
2 teaspoons tapioca starch
Filling:
2 pounds ground beef
1 small onion, chopped
2 cups chopped carrots
2 cups zucchini, peeled and chopped
2 cups peas
2 cups finely chopped kale
Instructions
In a large saucepan, boil the potatoes until they are tender (about 10 minutes). Mash the potatoes and cream them together with the butter, milk, salt and pepper until they are fluffy. Set aside.
Place all of the sauce ingredients into a blender and blend until smooth. Set aside.
Brown the ground beef and onions in a large skillet or saucepan. Drain the fat off the meat. Add the sauce and chopped vegetables to the skillet. Cover the skillet and allow the meat and veggies to simmer for 10-15 minutes until the veggies start getting tender. Don't allow them to cook all the way through since they will continue to cook in the oven.
Preheat the oven to 350 degrees. Transfer the meat and veggies to a 9x13 pan. Top the meat mixture with the mashed potatoes and spread it out evenly. Bake for 30 minutes at 350 degrees.
This recipe serves about 10-12 people.

- Posted using BlogPress from my iPhone
17.10.16
Dinner: coconut lime chicken
Dinner tonight people
Creamy Coconut Lime Chicken Breasts - a one pan, Whole 30 approved dish made with only a handful of ingredients. Dairy Free + Paleo + Gluten Free
5 min
Prep Time
30 min
Cook Time
35 min
Total Time
Ingredients
4 skinless, boneless chicken breasts
1/4 teaspoon sea salt
1/4 teaspoon black pepper
1 tablespoon coconut oil
1/2 cup red onion, chopped (it came out to 1/2 onion for me)
1 red chili, chopped optional
1 cup organic chicken stock*
1 tablespoon lime juice (about 1 large lime)
1 tablespoon chopped cilantro
1/2 teaspoon red chili flakes
1/2 cup full fat coconut milk from a can or coconut cream*
1 tablespoon arrow root starch for paleo or corn starch mixed into 1 tablespoons water optional* see notes
Instructions
Place the skin breasts between two pieces of plastic cling wrap and pound them down to make them even in thickness. This will help the chicken cook evenly and make for more tender chicken. Sprinkle each side of the chicken with salt and pepper.
Melt the coconut oil in a large skillet over a medium high heat on the stove. Add the chicken breasts and cook each side for 5-7 minutes or until browned on each side. Remove the chicken from a skillet and set aside on a plate. The chicken doesn't need to be fully cooked yet because you'll be returning it to the heat shortly.
Add the chopped onion to the same skillet and sauté for a few minutes to soften. Add the chili pepper if you're using it. Sauté another couple of minutes. Add the chicken stock, lime juice, cilantro and chili flakes. Bring the mixture to a boil and then reduce down to a simmer. Let simmer for about 5 minutes to let reduce down. Add the coconut milk and bring to simmer again for another 5 minutes. Add the starch and water at this time if you're using it. You may need to raise the heat slightly higher to bring this to a boil to activate the starch. Once the sauce thickens reduce it back down to a simmer.
Add the chicken back to the skillet, cover and let cook for another 5-10 minutes or until the chicken is cooked all the way through.
Serve with rice or cauliflower rice with the sauce spooned over the top.
Add an extra sprinkling of cilantro & chillies and enjoy!
Notes

Inspired from:
A saucy kitchen
- Posted using BlogPress from my iPhone
2.10.16
On Sundays We Meal Prep - take 2
I know I posted a while ago about our meal prep. Just making an update :)


Sara
Breakfast
- 2 Hard-boiled Eggs
- 1 cup peppers
- 1 cup spinach
Lunch
- Chicken Salad
- 6 oz chicken
- Peppers
- Carrots
- Lettuce
- Chopped Walnuts
- Half avocado
- Homemade Mayo
- 2 egg yolks
- 2 teaspoons freshly squeezed lemon juice
- 1 teaspoon Dijon mustard
- 1 teaspoon white wine vinegar
- Sea salt to taste
- 1/4 cup melted butter in a glass measuring cup
- 3/4 cup nut or olive oil (I use Avocado oil)
Snack
- 1 slice paleo bacon
- Half cup cherry tomatos
- 1 oz Brazil nuts
Jason
Breakfast
- 4 Hard-boiled eggs
- 1 cup oatmeal
- 1/2 cup blueberries
Lunch
- Ground turkey
- Rice
- Black beans
- Corn
- Salsa
- Jalapenos
Dinner prep for the week
- 6 peppers
- 5 carrots
Shopping List:
- 6 lbs chicken
- 2 lbs ground turkey
- 1 can black beans
- 1 pack corn
- 2 Jalapenos
- 1 pack celery
- 12 peppers (color choice is yours)
- 1 pack carrots
- 2 packs rice
- 1 bag lettuce
- 1 bag Spinach
- Container of Brazil nuts
- 30 eggs
- Chicken broth
- Bag of walnuts
Enjoy :)


7.6.16
Ultimate Reset : My Rogue Results

I stumbled upon the Ultimate Reset from Beachbody via the IG account "GetFitWithAshley" and started to do some more research. First, the cost is approximately $200 (whoa right?) but stop. It comes with 21 days worth of different supplements, a book full of recipes and lastly, a day-by-day guide for the entire 21 days.
So what drew me in? If you click the hashtag #UltimateReset you will see a landslide of people, all who have lost at least 10-12lbs in 21 days.Which is pretty cool to see. While I have been doing really well with getting in shape and losing pounds over the last year, lately I have hit a plateau and haven't figured out a way to break through. I spoke to my friend Melissa who is an amazing BeachBody coach and then ultimately decided to get the program. Her online challenge groups were an awesome asset to help assist the program with the inspiration, motivation, and accountability she provides you with alongside of the specific program.
I must be honest in saying that your individual results may vary and you should consult a doctor before attempting any new workout/eating program.
Pre-Reset:
- Before the box showed up, I googled the shopping list and went out and bought EVERYTHING
- Night before, I prepped all my breakfasts, lunches and supplements for 7 days
- I set the recommended alarms on my phone for reminders of the new schedule
- I ate a box of Oreos and a cheesesteak because why not


Week 1:
- Down 4 lbs
- Successfully cut out 10am snack for bottle of water
- Putting "mineralize" aka himalayan pink salt was fine. Putting the 1/4 tbsp in my water for those three is what I am contributing to NOT cramping one time during the Tough Mudder I completed
- Found that I quickly adapted to the regimen of timed drinking water and supplements at very specific times, something that I really liked and plan to continue moving forward

Week 2:
- Down 2 lbs
- Continue to be okay with no snack
- Absolutely hated the detox packet 3x/day and was really unsure of it's purpose
- Competed in a Tough Mudder on the last day of Week 2 so diet was not followed aka I inhaled a roast beef sandwich with cheese! (sorry it was a 12 mile obstacle course in the mud and rain)

Week 3:
- Down 2 lbs
- Felt really unexplainably hungry throughout the day despite following normal regimen
- Completed the Murph challenge the day after completion

Post Ultimate Reset thoughts:
- It was surprisingly easy to substitute a bottle of water for a snack at 10am (my normal snack time) and this is something I have continued
- Sticking to a timed scheduled has made it easier to maintain and control cravings/hunger
- I really disliked the power greens and detox
- The supplements were very easy to take
- There was never a point where I felt sick or dizzy
- I did not follow the recipe/food day-by-day
Would I do this again? YES
Would I do this the "rogue" way again?: Can't say for sure. I am at a very good point in my health/fitness journey. Who knows what the future holds - hopefully good things :)
How can I contact Melissa and purchase this?
You can purchase the program here and she will be in touch about getting started and set up
 Before you run out and buy this
 please read my disclaimers
- I did not follow the day-to-day recipe list
- Admittedly, I went out and bought the entire shopping list for Week 1 without really comprehending what can be prepped ahead of time and I will fail if I cannot prep
- I did, however, pick a few of the meals and prepped multiples of those
- I did not do two and a half weeks of vegetarian foods
- For me, it was not sustainable. I have chicken most days twice a day. I felt like even though this is what the reset calls for I believed any weight I would have lost exhibiting this behavior would have been false to my overall goals and therefore continued to eat meat. I will add that I did not have any red meat during this time
- I treated this like a Whole30 with a schedule and supplements
- I did not eliminate caffeine
- On a whole, I have a 12fl oz cup of black tea and that is it for the day. I went all of day 1 without coffee and felt very foggy and unfocused and ultimately decided to continue to incorporate singular cup of of tea
- I didn't drink any coffee
- I continued to work out
- Personally, I travel a lot for work (February-March I did 12 flights) and I often struggle to get to CrossFit when I am travelling so if I have the opportunity to go and workout, I am not going to pass up. It is simply not in me to not workout for three weeks
29.3.16
Mommy Wars: What's the Deal with Cloth Diapers?
What's OTB? |
No, OTB (at least in this case) is not referring to "off track betting" but instead "on the butt". In the large array of things that people feel is their business we have on the list diapers.
Diapers? Why are we discussing diapers?
Well, like everything else in the mommy wars, people have very strong feelings about how they would raise their child, and feel that you must comply or else.
For our family I chose, for a multitude of reasons which I will explain later, cloth diapering. Before I go into the Why's of the awesomeness of cloth that I felt made it great for our family, I will note that we have also utilized disposable diapers throughout our children's diapering history and may again in the future for one reason or another. So, please do not take offense to anything said here if you choose to use disposables.
Now, why cloth diapers? For me it was a multitude of reasons that just made it fit for us and I will go over 3 the biggest ones here. Then I'll answer some frequently asked questions that I have had over the last almost 4 years.
Grossness/The environment
Biggest of all was the fact that the thought of a landfill full of used disposable diapers makes me want to vomit (I hope you're not eating and if you are I apologize). It was just something that I could not get past. I am a pretty green person (drive a hybrid, compost, recycle all things possible, avoid GMOs, have our own garden, try to conserve water and other resources as possible, etc), and that was just one thing that I could not get over easily. So if I could do my part by NOT adding to the pile of diapers, I would.
The questions I get frequently regarding our choice to cloth was what you do with the "poo" ("ew I could never do that, you have to like, touch the poo right?") and "do you really put that in your washing machine?". And the answer to those are simple.
#1 I touch no more poo than I would if the kids were in disposables (maybe less as cloth is much less likely to have the patented "poo-splosion" that you see so frequently). There are easy ways to get the poo off such as a diaper sprayer {http://www.amazon.com/Cloth-
#2 My question back to you... do you assume that the only thing a child will ever get poop on is a diaper? If so, my friend, you are quite mistaken. See the above aforementioned poo-splosion issues. And unless you plan on throwing away a TON of clothing, I am going to assume that you are going to take that poo-tainted clothing and put it in your washing machine. And you know what? It'll be fine. You will not die from the plague. If you have a washing machine that is worth anything, it will very easily wash away the evidence and you will never notice the difference.
Also, the thought of the amount of processing that goes into each of those diapers just gives me the chills.
Cha-ching
Cost for me was a big one. We can debate the cost differential between the two for days. I have several friends (the host of this blog for one) who went to quite a length to ensure that their diapers were as cost effective as possible, couponing and looking for sales.
It also can be debated whether the cost of a new set of cloth diapers (which can range from the low end of $400 for a stash to $1500+ if you go with the high end diapers or an abundance of wool covers) is really cost effective. Honestly, it depends on how you go about building your stash. For us, limiting cost was important so I aimed for diapers that would last us the longest (One size, aka diapers that can be adjusted to fit from ~8 pounds to upwards of ~40 pounds). There are an overabundance of types of diapers ranging from the simplest (covers and flats) to the more complex (an array of all-in 1,2s).
I was quite fortunate that my mother-in-law was big into sewing and enthusiastically okay'd the production of a set of pocket diapers {http://www.diaperjunction.
Over time I started to collect covers {http://www.assuntastore.com/
The costs associated with cloth can be easily managed by adjusting a few variables: picking cheaper/more cost effective diapering options; running a more efficient washer; utilizing certain laundry soaps and buying them when on sale; etc. For us the biggest cost driver would be that I could use them for more than one child. The diapers that we used for my 1st, we are now using for my second, saving us hundreds of dollars this time around. Also diapers that I had purchased for the very early days of my 2nds time home with us were passed on to a friend who used them with her little one, getting a 3rd life (and putting a little money back into our costs for diapering). There are several venues for selling diapers that are still in very good or excellent condition such as diaperswappers.com or one of several Facebook groups.
If you know how to sew you could easily create your own stash with a few materials and some time spent. It would be much cheaper than most of what you could buy out there.
Limiting Chemicals
Do you have any idea what is actually in your disposable diapers? You know those things that you strap onto your child and let them sit in/on it all day? The outer lining is typically a polyethelyne film similar to that in plastic wrap. The inner lining is polypropylene, material common in thermal underwear. The absorbent center can have one of a multitude of different materials inside including sodium polyacrylate (the crystals that show up when your munchkin pees a little too much and the diaper leaks on you) or wood pulp. All of these things are probably okay, but I prefer to stay away if possible.
What's in a cloth diaper? Well, if you go the most natural route you are utilizing some kind of cotton/hemp material with a wool cover (wool is super absorbent). Otherwise, you are using some combination of diaper that utilizes an outer layer of polyurethane laminate (fabric that has a laminating layer of polyurethane or PUL) with an inner layer of fleece/terry cloth/flannel. Often microfiber inserts are used in pocket diapers (but these do not touch the skin of the baby as they are super drying and would cause a rash if used inappropriately.)
We utilize (mostly) the prefolded cotton diapers and cotton flats with the PUL covers. I have crocheted up a few wool covers but prefer the ease of the PUL.
So why cloth? The Q&A
So, with all of that being said, I still get a lot of questions like:
Are you that poor?
No, and that's rude. Why am I friends with you again?
Okay, but don't you do a lot of laundry?
Yes, we probably do twice the amount of laundry that the average disposable-wearing household does, but it really only takes a little bit of time to throw them in the wash, move to the dryer, and later fold. I personally prefer knowing that if I need diapers, I am just an hour or so away from having them (are you ever REALLY on your last diaper? No, maybe 1 or 2 away... but never the last one), versus having to run out to the store to pick up more.
Isn't it gross?
Aren't all diapers gross? It's poop and pee, what isn't gross about that?
Doesn't it smell?
See above. It doesn't smell any more than disposables. And honestly, with the omission of the perfumes that most disposables have, they actually smell less.
Your house must stink of diaper
No more than any other house with a baby. And actually there are no chemically smells/perfumes from cloth, so I actually notice those smells more when out.
Isn't it a lot of maintenance?
Again, other than the laundry that we do, it's really not that bad
Isn't there a service that can wash them?
Yes... but it's not cheap. And we're trying to save money.
Will it affect their walking/crawling/other development?
What do you think people wore BEFORE disposable diapers? Your parents' parents learned to walk right?
Doesn't all that wetness cause diaper rashes?
Your typical cloth diapered child will have no more rashes, and may actually have less rashes (depending on the skin of the baby) than a disposable-diapered baby. The rash creams are a little more expensive (as you cannot use creams with petroleum - ew anyway - as they would cause the fabric to repel and would cause the diaper to leak). We had one rash prone baby and another baby with only one rash his whole life. It's the luck of the draw with that one I'm afraid.
You're just being a gross hippy
Nah, not hippy. Just doing my part.
What do you do if you, like, have to go out?
You, like, bring diapers with you. Same thing as disposables. They're just bigger. And you bring along a wet/dry bag {http://www.target.com/p/skip-
So, cloth diapers... those are the things with the safety pins right? How do you not stab the baby?
Well cloth has come a long way. Sure, you can still buy diapers that you could utilize the pins with, but why bother? You can use something like a snappi {http://snappibaby.com/
Are you nuts?
No, not at least according to my therapist.
What is wrong with you?
Lots of things, but they don't have anything to do with my choice of diapers
Why would you do that?
Please see my reasons above.
Okay, you gave us pros, what are the cons?
#1 Biggest gripe? - I cannot find pants that don't look ridiculous or aren't super expensive (like most clothing for children). Project Pomona pants are one of a few groups that have pants made especially for that cloth diapered fluffy butt {http://www.projectpomonashop.
#2 - Sometimes I just don't want to do any more laundry! There are days when everyone gets home and just wants to go to bed. Well when you have kids, that doesn't really work. So after you get dinner made, children fed, bathed, and put to bed, dishes washed, and finally sit down you realize "oh hey, I really should start that diaper laundry". And sometimes, you just don't want to. Honestly, we never let it hit the point where we would NEED to do diaper laundry. I just like to stay on top of things, so we do it pretty much every other day, to every 3 days.
3# - Dealing with the comments. I can't tell you how many times people have commented on the fact that my children are wearing cloth diapers. "Are they ever going to be able to walk?" "That's so gross, I couldn't deal with cleaning them" "Why are you doing that, why not just use disposables?" "Why are you so gross? Hippie!"
#4 - No cute diaper bag. I am a girl who likes things to put stuff in. Containers, bags, etc, I'm game. However, it seems that all of the "cute" diaper bags are simply too small to really fit in more than a few diapers. 2 cloth diapers can take up just as much room as 6 disposables. And that is just not going to work for a day away from the house. So we have to tote a little bit more around than the average family, so be it. I can still throw a diaper, wet bag, and some wipes in my purse and run out if necessary, so it's not THAT big of a deal.
A lot of people just don't get it. And honestly, I don't know how to explain to them that it honestly is no different than using a disposable in functionality and is no less or more gross when it comes to dealing with waste. My recommendation to those who are curious would be to find your friendly neighborhood cloth diapering group/person and give one a shot. What's the worst that could happen?
Any parting words?
In the end who cares what's on the butt? As long as that butt is clean and the baby is happy.
15.2.16
BURNTHIS LAUNCHES VIP CHALLENGE FEATURE TO SUPERCHARGE FITNESS MOTIVATION
BURNTHIS LAUNCHES VIP CHALLENGE FEATURE TO SUPERCHARGE FITNESS MOTIVATION
BurnThis, the mobile app fitness super community that helps you find motivation and inspiration to be healthy, just launched a new innovative feature today called VIP CHALLENGES. The premium feature gives users access to 30-day curated collections of lifestyle hacks (including fitness moves, recipes, nutritional tips and motivational mantras) that are easy to follow and help improve your overall health and happiness daily.
BurnThis is a social fitness app that allows users to discover and share fitness tips, healthy recipes, accomplishments and goals using cutting-edge photo customization and social sharing tools. The company's mission is to use technology to harness the power of community in order to foster the world’s most active network of fitness lovers who motivate and inspire each other to live healthier lives. In addition to finding a supportive fitness community, users can also participate in branded weekly and monthly challenges for a chance to win a variety of wellness products and services to motivate themselves even more. The iOS app, which formally launched in January 2015, prompts users to create a fitness profile that includes fitness accomplishments, goals, and insider fitness tips. Users can find everything they are looking for related to health and fitness in one place without having to scour the internet or sift through non-fitness related posts like they do in traditional social media.
VIP Challenges take motivation to a whole new level with quick and easy premium 30-day challenges, curated by BurnThis and popular favorite professionals and celebrity trainers. The time-released daily fitness and nutrition hacks are fun and easy, while also helping users to modify the way they think about exercise and food in order to deliver real results. Each week BurnThis awards a $100 cash prize to one lucky winner for added motivation. "Our whole goal is to give people an extra boost that makes them feel like they aren't in this alone - that there are resources readily available to make healthy living easy and fun," explains co-founder Anna Kohanski Mason. "The motivation, inspiration and new ideas that people get from each others' posts is the foundation," co-founder Monica Johnson continues, "VIP Challenges is an extension of this concept because it enables our users to learn about BurnThis' own curated fitness moves, foods, tips and mantras to further enhance their personal wellness journeys."
Finding the motivation to stay on track can be hard. Industry research suggests that those who share photos of their workouts and progress are 5 times more likely to stay on track with their goals. Setting goals is also an important component of staying motivated and achieving fitness success. A feature in the Harvard Business Review recounts decades of research on human performance that explains nine steps that highly successful people take to reach their goals including being specific, knowing exactly how far there is left to go, building self-control and focusing on the positives instead of the negatives. With the launch of VIP, BurnThis combines these core principles to help people stay on track.
BurnThis is now available for free on iTunes App Store. Customers can access Premium VIP Challenges with an in-app subscription of $2.99/month. All VIPS receive their first month free.

Subscribe to:
Posts (Atom)